Last Updated: June 28, 2020 | Reading Time: 3 minutes
Amazon S3 is a scalable storage service from Amazon Web Service, I frequently use it for high traffic and heavy image / video sites, more than that, it also simplify the manage and backup process of your site because the “heavy” part of the web are hosted in different place from your server.
Create a User
First of all, create an account. go to Services > Administration and Security > IAM (Identity and Access Management).

Go to User tab, and create a user.

Next step is to give created user a “Permissions” and get “Access key”.

Click on Attach Policy and add “AmazonS3FullAccess” policy. Continue with Manage Access Keys to generate Access Key and Secret Access Key.
Create a Bucket
First of all, login to your AWS account and go to Services > Storage and Content Delivery > S3.
 Go ahead, Create a Bucket.

Bucket Name can be anything, but to avoid confuseness, you can use your domain name. Select the region nearest to your server location or your target audience location. Go click “Create“.
Select your newly created bucket and select “Properties” tab on upper right.
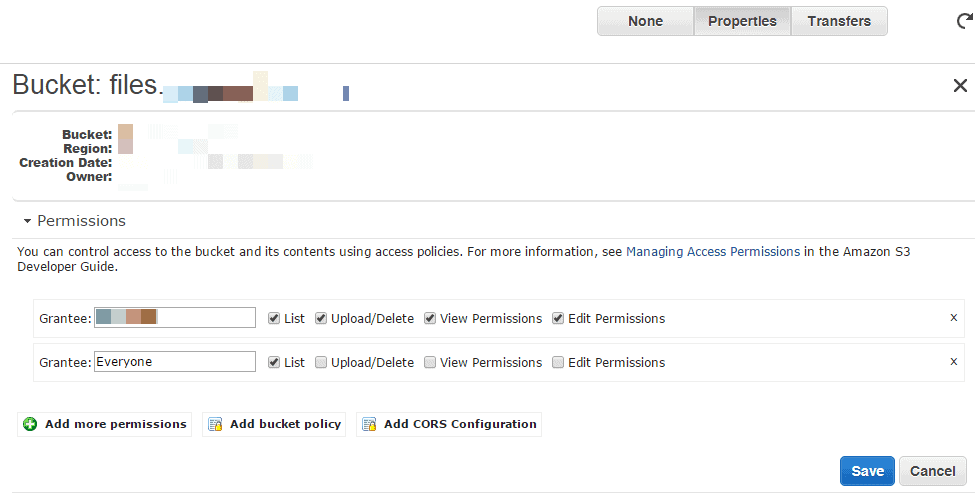
On “permissions” tab, add grants to your created username and add “Everyone” to allow everyone can read your bucket. If you plan to use CloundFront CDN, you don’t need to add “Everyone” access.
WordPress Side
Install Amazon S3 and CloudFront plugin. This plugin require Amazon Web Services plugin, you will be prompted to install this plugin also.

add access key and secret access key you got in previous step to wp-config.php, you should do this manually.
define( 'AWS_ACCESS_KEY_ID', '***********' );
define( 'AWS_SECRET_ACCESS_KEY', '*****************************' );
Next go to AWS > S3 and CloudFront. Select bucket you created.


After you select a bucket, save the option and you are ready to go.